How to Make a Wedding Map for Free in Canva: 2 Best Ways
It’s common knowledge that your guests can access the location of your wedding venues with their mobile phones. However, incorporating a wedding map into your wedding invitations or providing it as a separate card to your guests is always considered good wedding etiquette because of the added convenience. Additionally, wedding maps serve the useful purpose of instantly familiarizing your guests with the whereabouts of your wedding venues and events.
Wedding maps are specifically useful for destination weddings and for guests visiting from different states and countries. Generally, a wedding map is less cluttered than a typical Google map, making it easy to read and understand. Further, an elegant wedding map presented along with a weekend itinerary adds aesthetic value to your wedding invitation card and creates excitement about the special day among your guests. Wedding maps offer a unique way to add a personal touch by showcasing wedding and reception venues, as well as nearby attractions and recommendations.
A convenient way to digitally create an elegant wedding map in Canva
You can easily create these wedding maps in Canva, a free graphic design software with many convenient features. As long as you are computer-proficient, you can unleash your imagination to create unique designs without any graphic design experience. Additionally, you can creatively use this software to DIY other wedding stationery designs as well. I wanted to share my unique method for creating wedding maps in Canva through this tutorial. You can access the wedding icons used in this tutorial via a Canva template. Click here to access the icons.
Basically, there are two methods that I find useful for creating wedding maps in Canva. The first method is to draw the map yourself using Canva’s Draw feature, ideal for maps with curvy routes. On the other hand, the second method involves the use of the rectangle shape for drawing routes, which is quite convenient. This method can be easily used for maps with routes that depict straight lines or minimal curves. Let’s explore these two methods in detail through video tutorials and instructions.
Method 1: Drawing a wedding map in Canva
Video Tutorial
1. Take a Google Maps screenshot of your wedding venue
The first step is to have a base for creating your own digital wedding map. Simply search your wedding venue on Google Maps and take a screenshot of a specific area you want to showcase on your wedding map. It is advised not to take a screenshot that is too broad or too small. The purpose of a wedding map is to provide your wedding guests with clear directions to various venues of your wedding as well as nearby attractions (this is optional). A map that is too broad with many routes can appear cluttered and confuse your guests. Ensure that the screenshot includes all important venues, such as ceremony and reception locations, accommodation hotels, and any other events you might have planned. Additionally, you can also showcase nearby recommendations of places and restaurants on the map, although this is entirely optional.
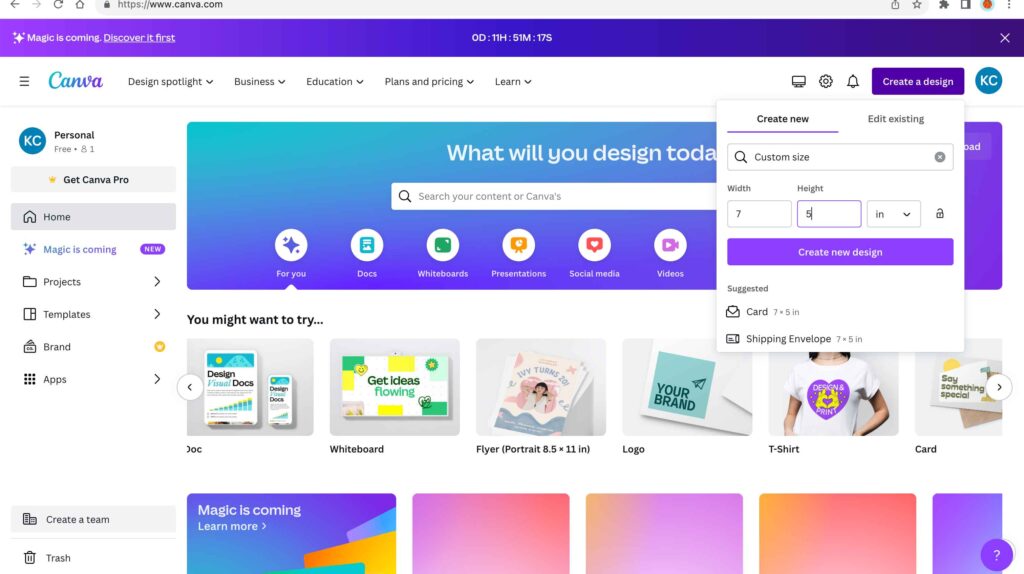
2. Create a blank template in Canva
You can create a Canva template of any size. If you are planning to include a wedding map on the back of your wedding invitation card, choose the size of your invitation card. A common size for a wedding invitation card is 5 x 7 inches. If you are incorporating a wedding map into your wedding invitation card, it is better to have a landscape orientation than a portrait because it appears more coherent to depict a wedding map on the left and wedding details on the right. However, it does not mean that you cannot have a wedding map invitation card in portrait orientation; you can always find unique ways to present your design in any orientation.
There are two most common sizes for wedding map invitation cards:
- 7 x 5 inches
- 8.5 x 5.5 inches
For the purpose of this tutorial, I have chosen the size of 7 x 5 inches. You can choose the slightly larger size, i.e., 8.5 x 5.5 inches, if you prefer.
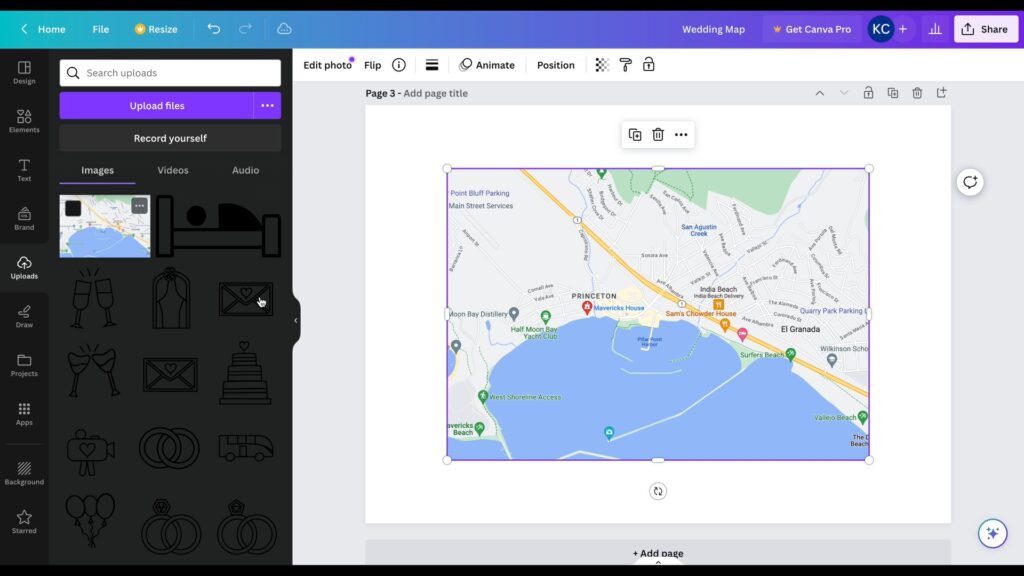
3. Add the Google Maps screenshot to the blank template
Click the “upload” icon in the Canva toolbar on the left and bring the map screenshot into your template. Resize the screenshot to fit the template in order to make it easier to draw.
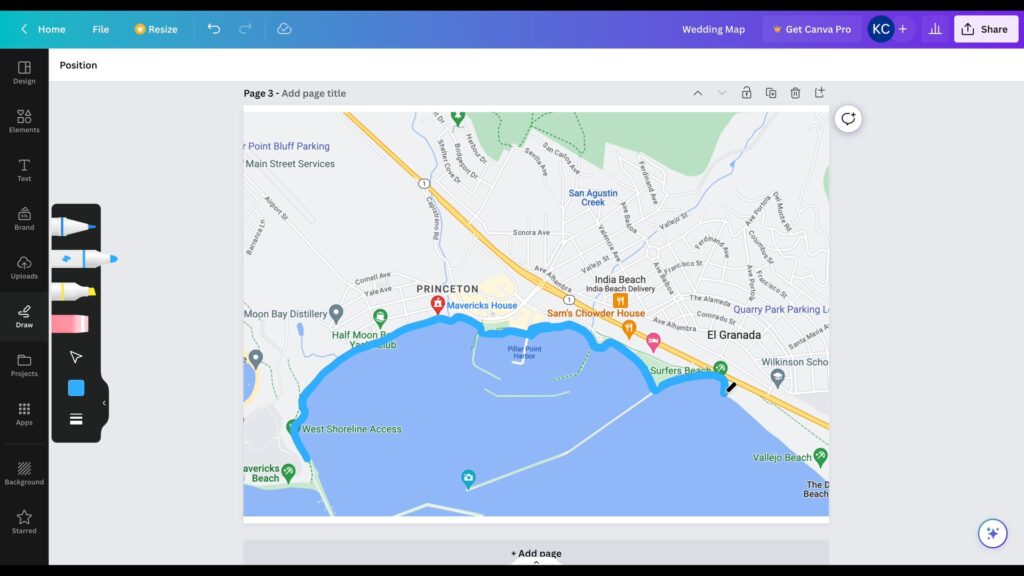
4. Draw the routes and any water bodies (if applicable) by tracing the Google Map
- Click the “draw” icon in the Canva toolbar on the left and select the “marker” tool.
- Set the marker weight to 8 pixels, pick a blue color, and start outlining any waterbody, such as lakes and beaches (if applicable), on the imported Google Map screenshot.
- After creating an outline, increase the marker weight to quickly fill in the waterbody.
- Change the marker weight back to 8 pixels and pick any color of your choice. Don’t worry about picking the wrong color. You can always change the color of the drawn elements at any point.
- Start tracing the adjoining routes to the wedding venues.
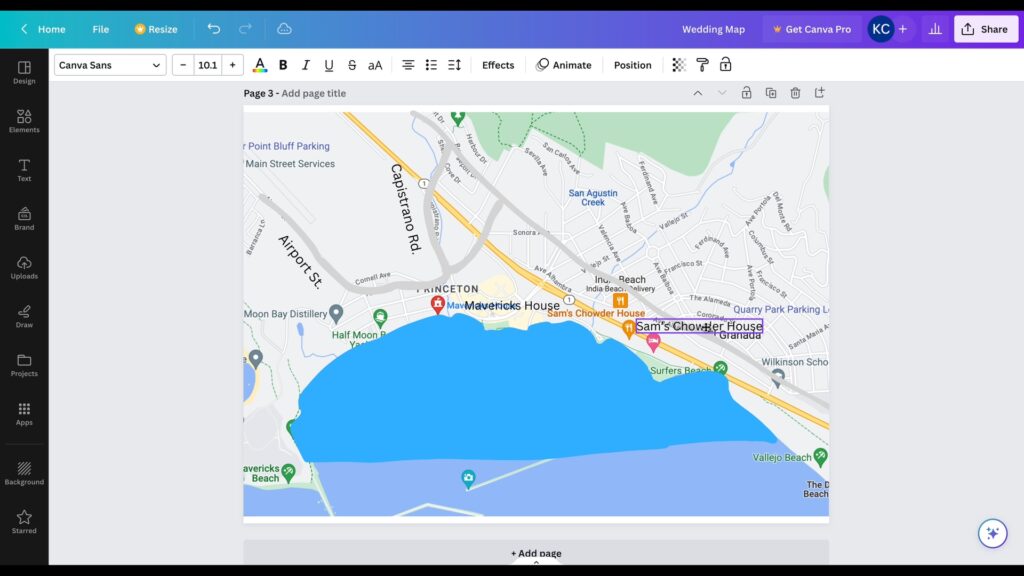
5. Add names to the adjoining routes and wedding venues
Click the “text” icon on the left to add names to the wedding venues and the adjoining routes. Rotate the text as needed in order to align with the routes.
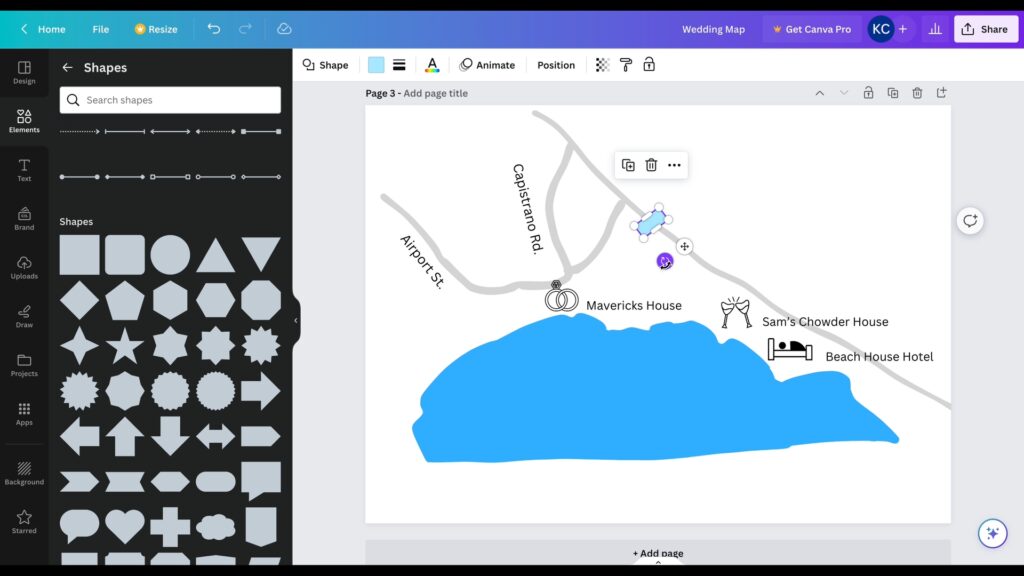
6. Delete the Google Map in the background and add icons to wedding venues
You can either use our wedding icons or add a generic location icon available in the Canva Elements library to identify wedding venues on the drawn map. Move and resize these icons as needed in order to fit them into the overall map design appropriately.
7. Add the pill shape to indicate any highway numbers on your wedding map
You can further add the pill shape available in the Canva elements section to indicate any highway numbers on your map. This can serve as very useful information for your guests, especially the ones who are driving to your wedding.
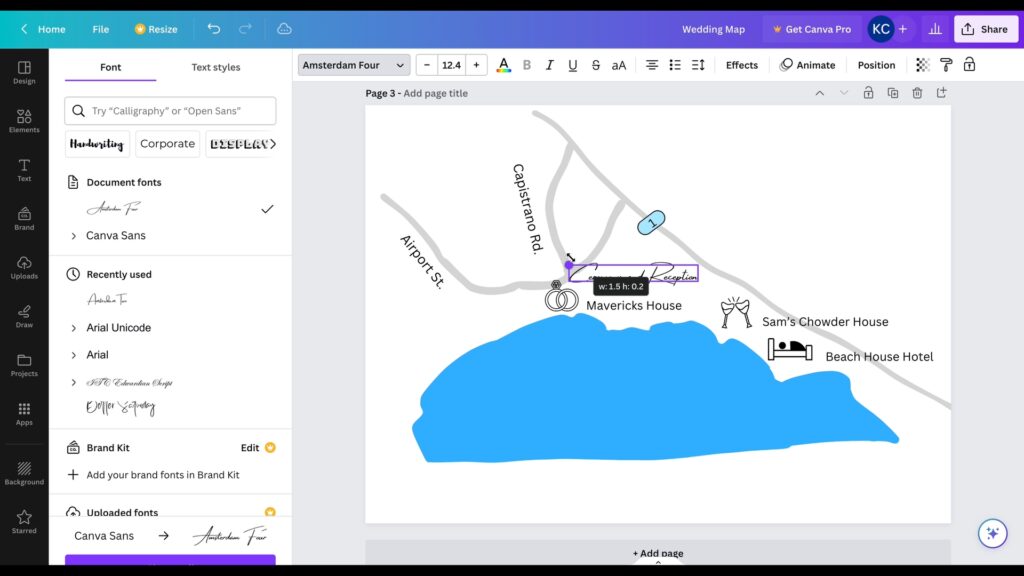
8. Add event names to the marked locations
Add event names to the marked venues, such as “Meet and Greet”, “Ceremony”, and “Reception”, to make your map highly informative. Also, you can experiment with different font styles for event names. I personally prefer the signature fonts available in Canva. These fonts add a modern touch and elevate the overall appearance of your map.
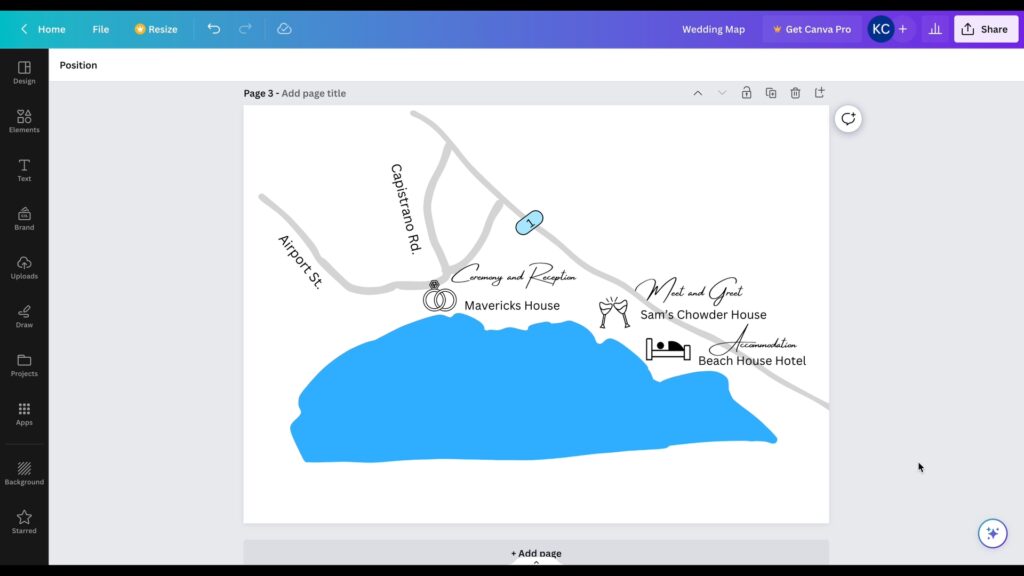
9. You are all set!
The wedding map is ready. You can either include this map on the back of your wedding invitation card or incorporate it into your overall wedding invitation design. You can either design your own template or download our Canva Wedding Maps Invitation Card Template for free and insert your wedding map into that template.
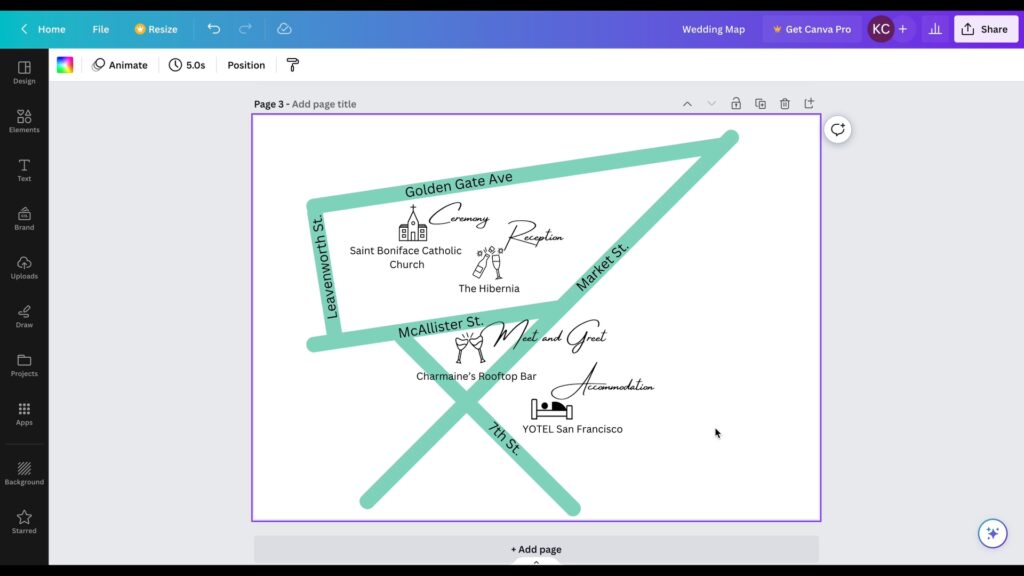
Method 2: Using the rectangle shape to draw routes in a wedding map
Video Tutorial
If adjoining routes on Google Maps are almost straight and not curvy, you can use the rectangle shape in Canva to add the routes. Here are the steps:
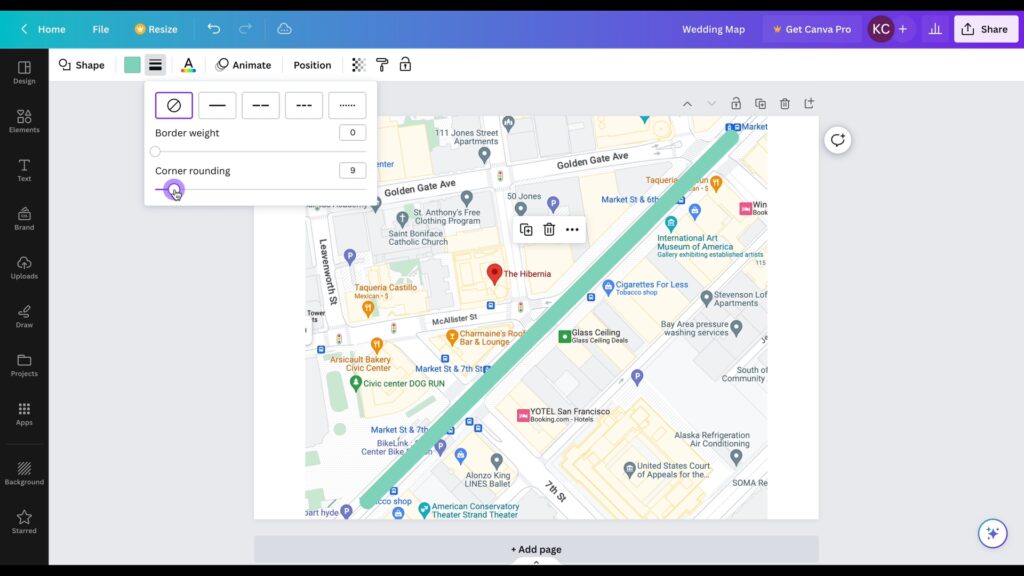
1. Click the “Elements” section in the Canva toolbar on the left.
2. Select the rectangle shape.
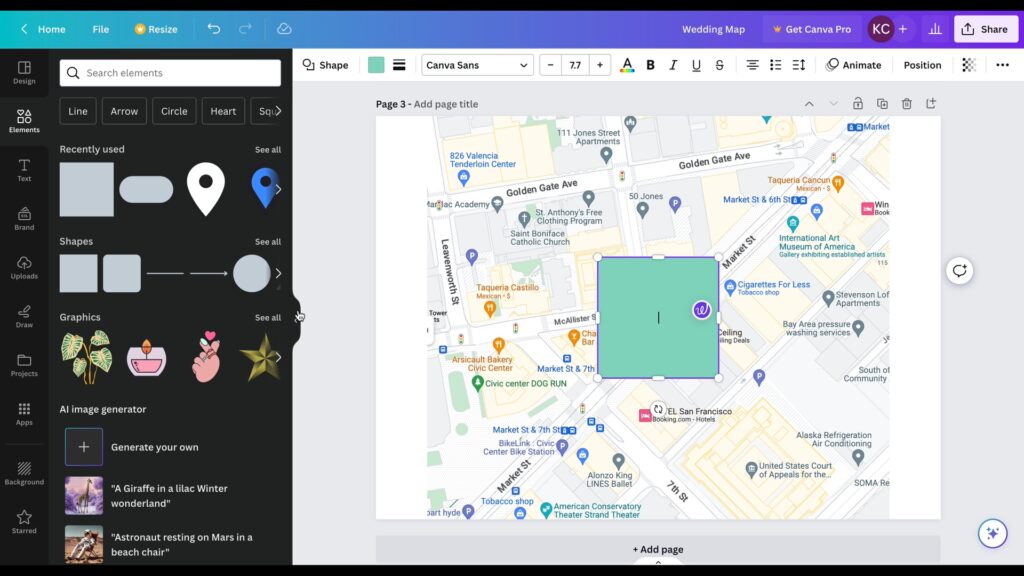
3. Trace one route by adjusting the width and height of the rectangle.
4. Click on the “text” icon in the Canva toolbar on the left and add the name to this route.
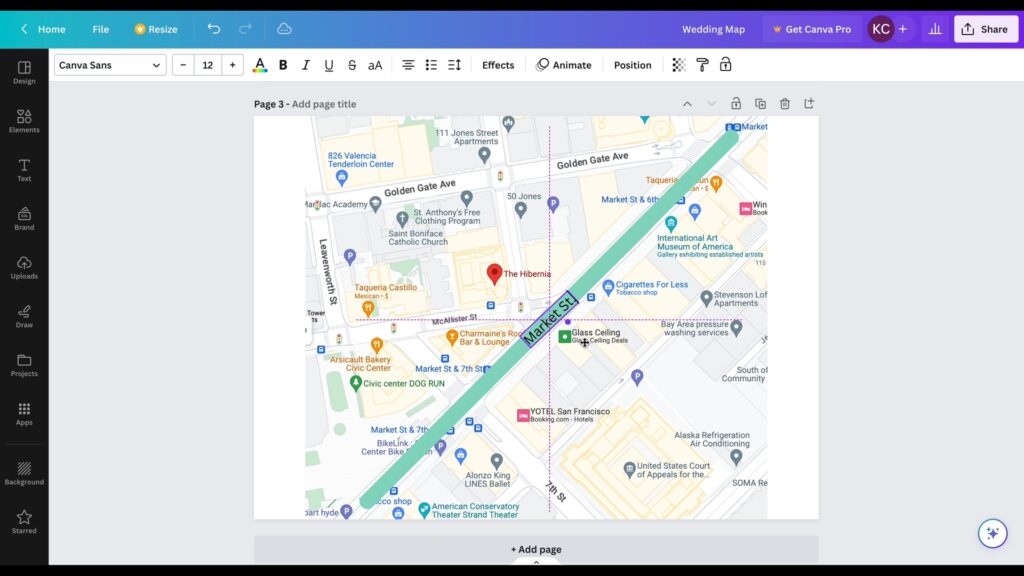
5. Copy and paste this route to replicate other routes by rotating and adjusting the height.
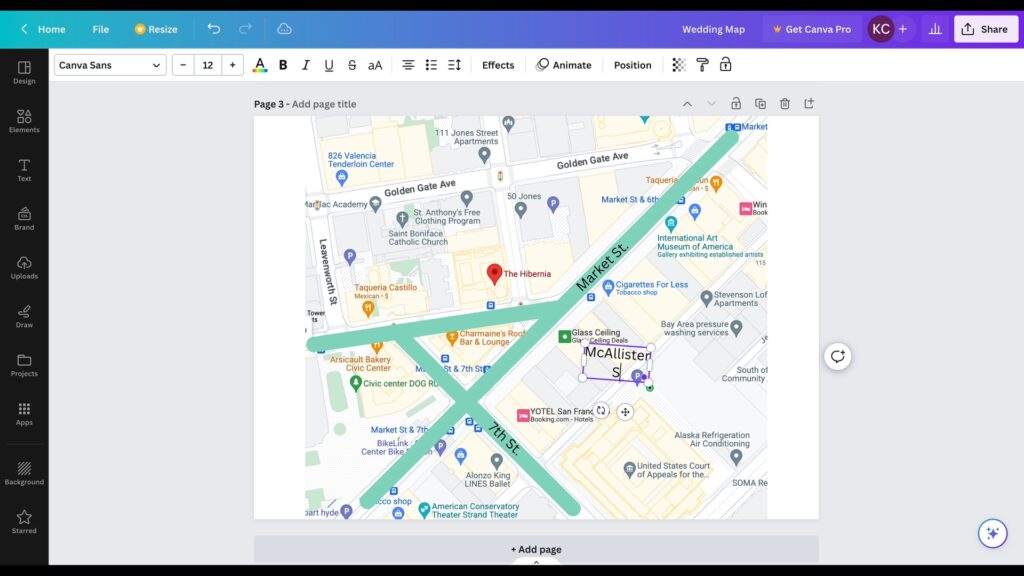
6. Add names to all routes by copying and pasting the first route name and updating it for other routes. This ensures consistency in the font type and size across the map. Rotate the text as needed to align with the respective routes.
7. Add names to wedding venues and accommodation locations.
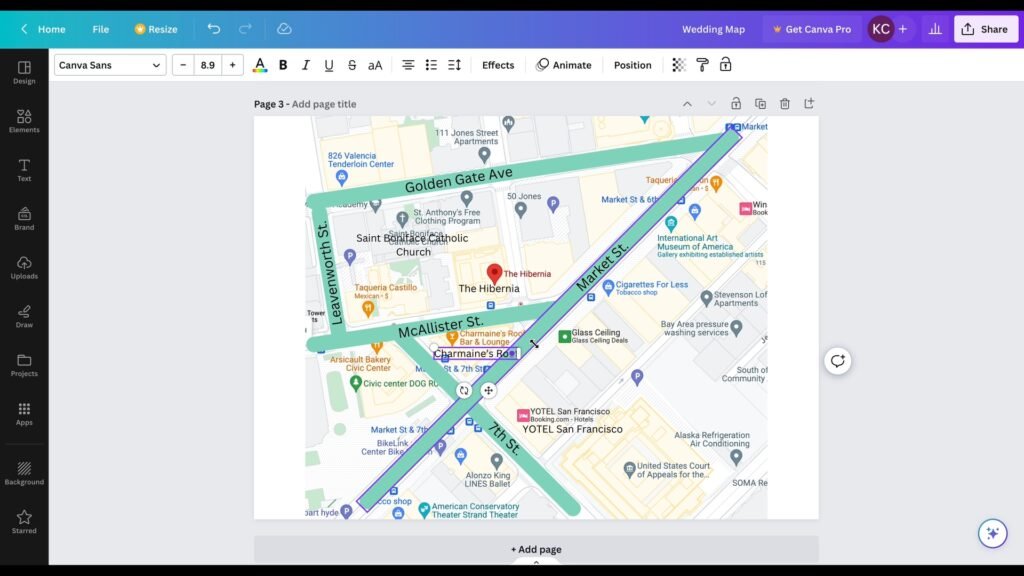
8. Add either a generic location icon available in the Canva Elements Library or our exclusive wedding icons to identify the events and places on the map. Click here to access our free wedding icons.
9. Add names to the marked wedding events, such as “Ceremony”, “Reception”, and any other events you want to include. Also, indicate any hotels reserved for your wedding guests.
All other steps are the same as in Method 1.
Written by Kash C. The writer is a graphic designer with expert knowledge of wedding stationery.