How to Make a Photo Background Digital Wedding Invitation in Canva
Digital wedding invitations displaying a wedding couple in the background are quite popular. A video wedding invitation that depicts a photo background with wording in elegant fonts appears sophisticated and classy. If you are getting married soon and want to design your own digital wedding invitation, then this guide is perfect for you. You don’t need to know complex software to make these invitations, as you can easily design them in Canva. Canva is user-friendly, drag-and-drop graphic design software that you can use to make an animated wedding invitation. In this guide, we will explore a step-by-step process for making a photo background digital wedding invitation in Canva.

1. Select the Right Canvas Size Preset
Canva has various canvas size presets that offer the right dimensions for different social media platforms and formats. For instance, Canva offers canvas-size presets for Instagram Reel, Instagram Post, and Instagram Story. These presets save time and effort, as you don’t need to figure out the ideal dimensions for your file.
- Log in to Canva’s Home Page.
- Select the Instagram Reel Canvas Size Preset: This preset’s dimensions are 1080 x 1920 pixels, which is ideal for viewing a video on any phone.

2. Design the First Slide (i.e., the Couple’s Names Slide)
The first slide relates to the couple’s names. In order to design this slide, perform the following steps:
Upload, Add, and Resize the Photo
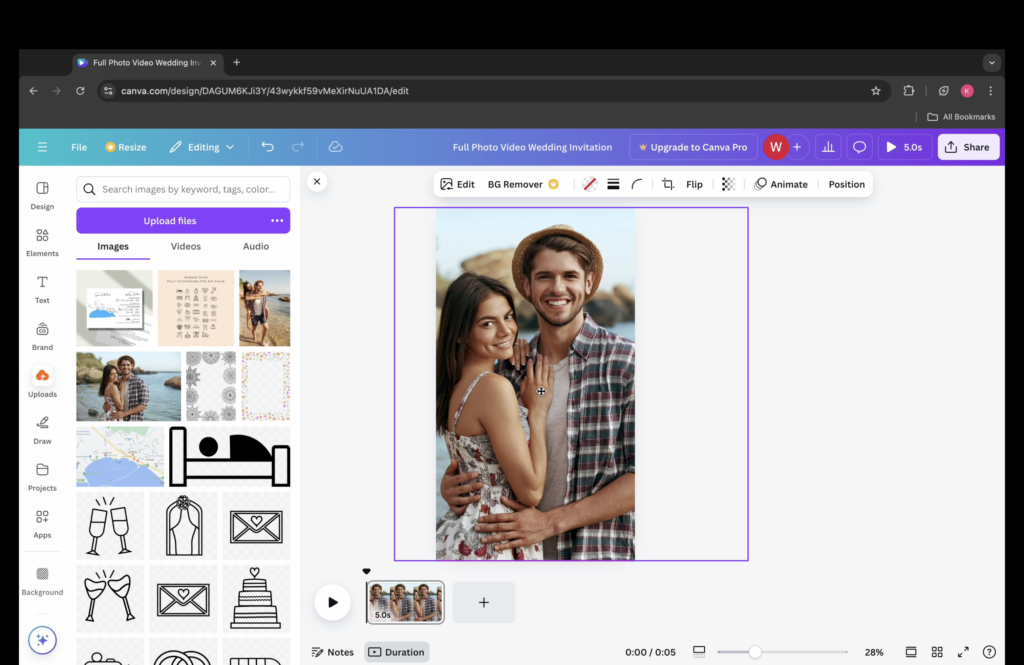
- Upload your photos using the Uploads tool in the toolbar on the left.
- Click on the uploaded photo to bring it to the canvas.
- Resize the photo to fit the canvas.
- Adjust the positioning of the photo if required.
Add a Transparent Overlay
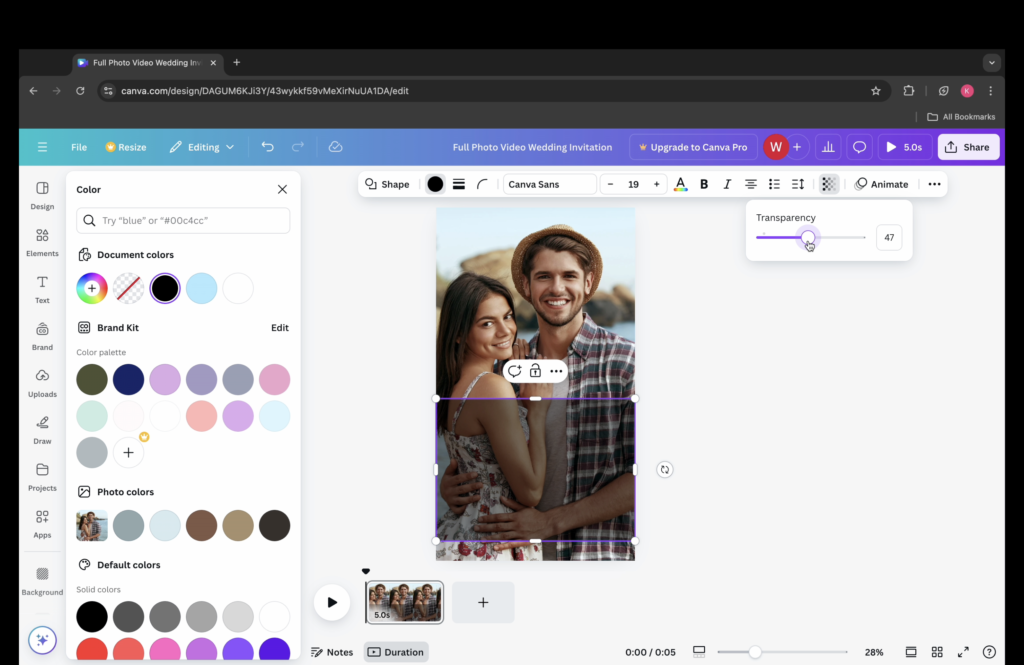
In order to make text stand out in your wedding invitation, you need to add a transparent overlay over the background picture.
- Add the square shape to the canvas from the Elements section of the toolbar.
- Extend the shape across the bottom half of the canvas.
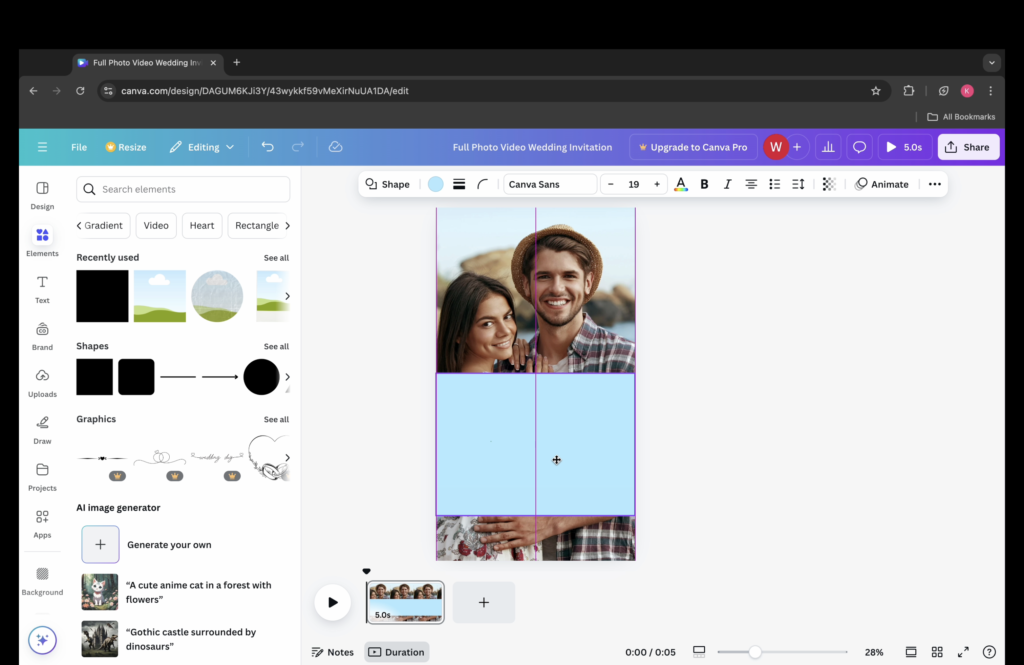
- Change the shape’s color to black.
- Adjust the opacity of the shape. Make sure you avoid lowering the opacity too much because, in that case, the text will not stand out. In this tutorial, the opacity level is set at 47. This level can vary based on a photo’s colors and brightness.
Add the Text
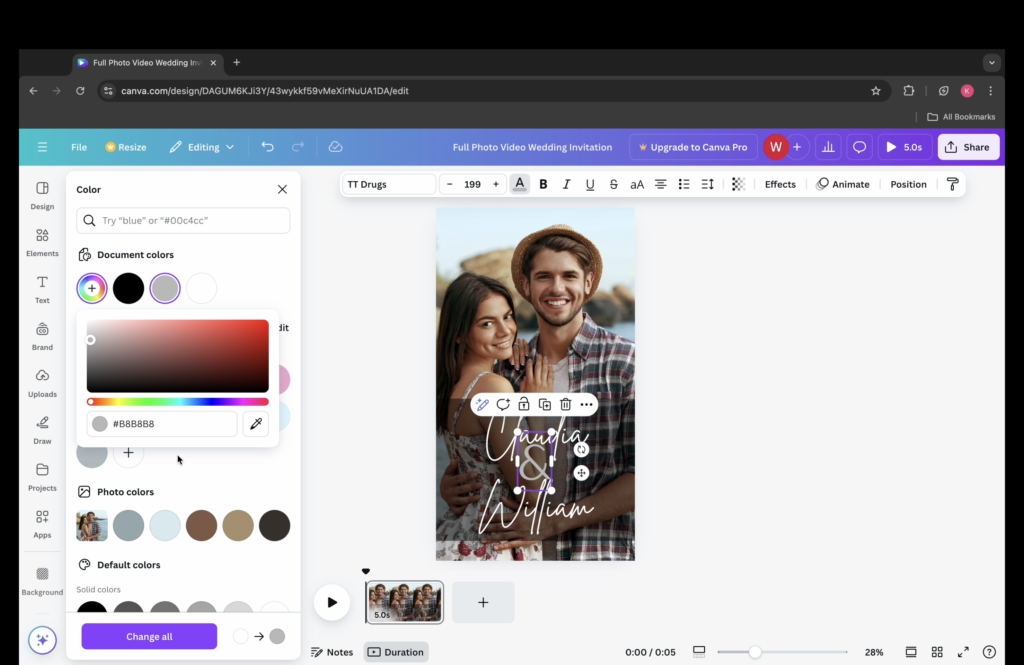
Add the bride’s and groom’s names in an elegant font of your choice.
Canva offers a huge library of free fonts. The type of font depends on your personal preference. You can choose from a variety of font types, such as serif, sans serif, and signature fonts. While serif fonts make a wedding invitation look sophisticated and formal, signature fonts add a lively vibe to a wedding invitation.
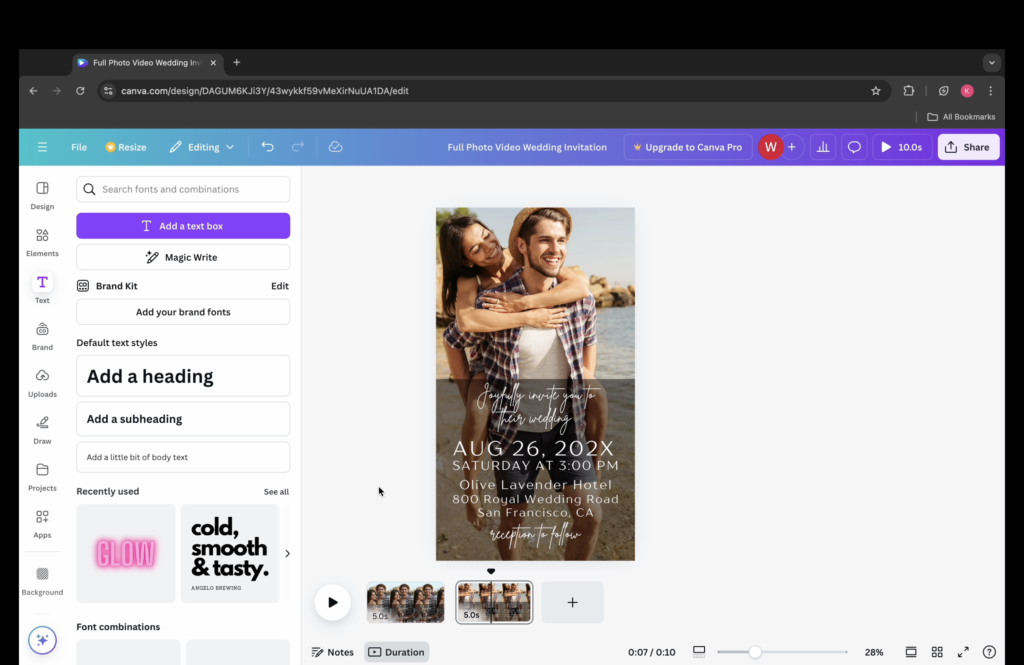
3. Design the Second Slide (i.e., the Wedding Announcement Slide)
- Add the second slide by clicking the Plus button on the timeline at the bottom.
- Add and resize the second photo to fit the canvas. Adjust the positioning of the photo as needed.
- Add a transparent overlay as mentioned in the second step above.
- Add the wedding details, including the following:
- Wedding Date and Day
- Wedding Time
- Venue Name and Address
4. Design the Third Slide (i.e., the RSVP Slide)
- Add the third slide by clicking the Plus button on the timeline at the bottom.
- Add and resize the third photo to fit the canvas.
- Add the RSVP deadline and wedding website address.

5. Animate the Slides
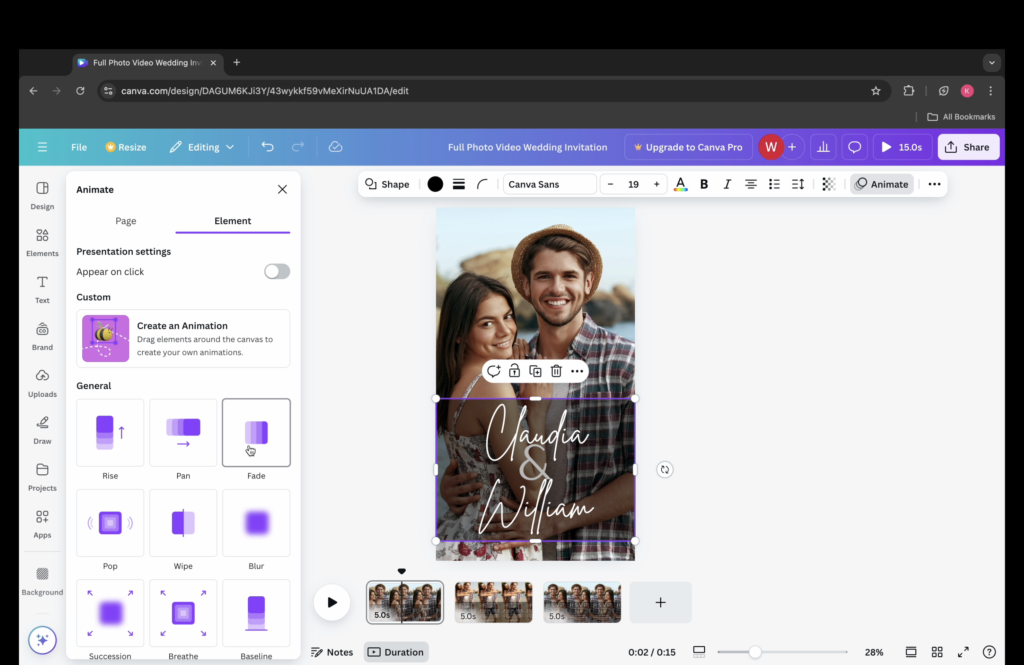
With the Animate tool, you can add animation effects to each element on a canvas separately.
- Click the Animate button on the toolbar at the top of the screen.
- Choose from a variety of animation effects.
6. Download and Share
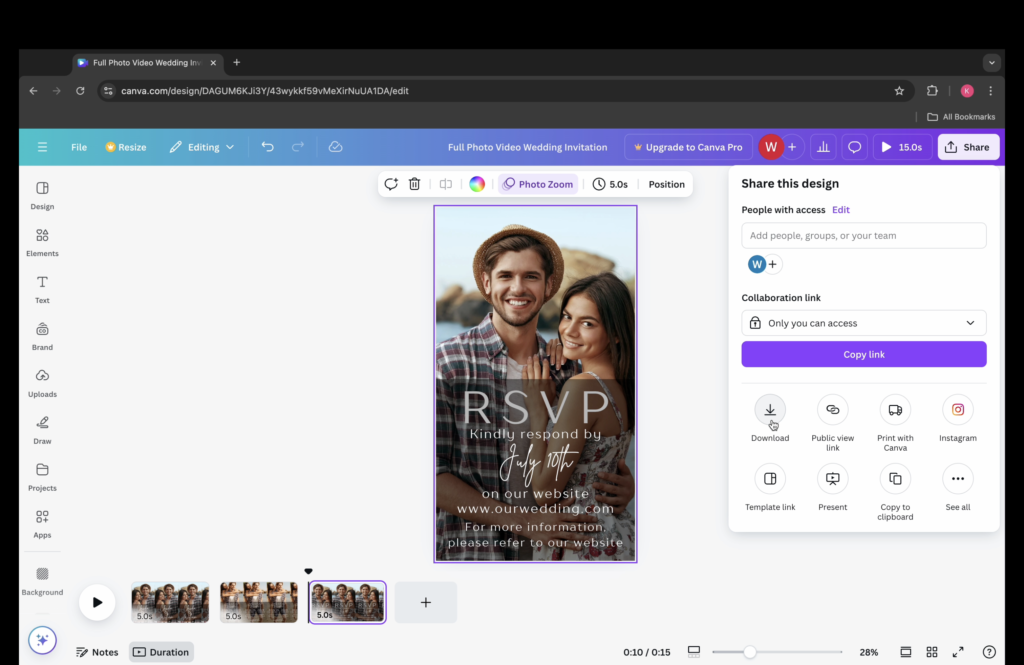
- Click the share button on the header menu in the top right corner of the screen.
- Click the download button in the drop-down menu.
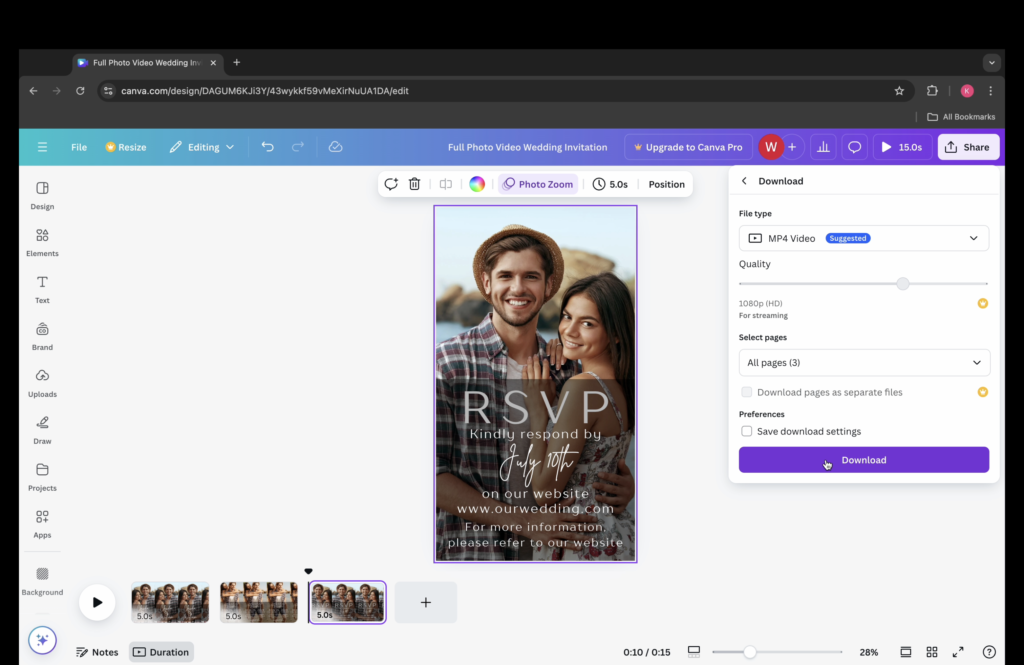
- Download the file in the mp4 format.
- Share the downloaded video with your guests via a messaging app or an email.
Link to the FREE Template: Free Photo Background Digital Wedding Invitation Template
Written by Kash C. The writer is a graphic designer with expert knowledge of wedding stationery.